This post contains affiliate links. We may earn money or products contained in this post. Please click my disclosure policy to learn more.
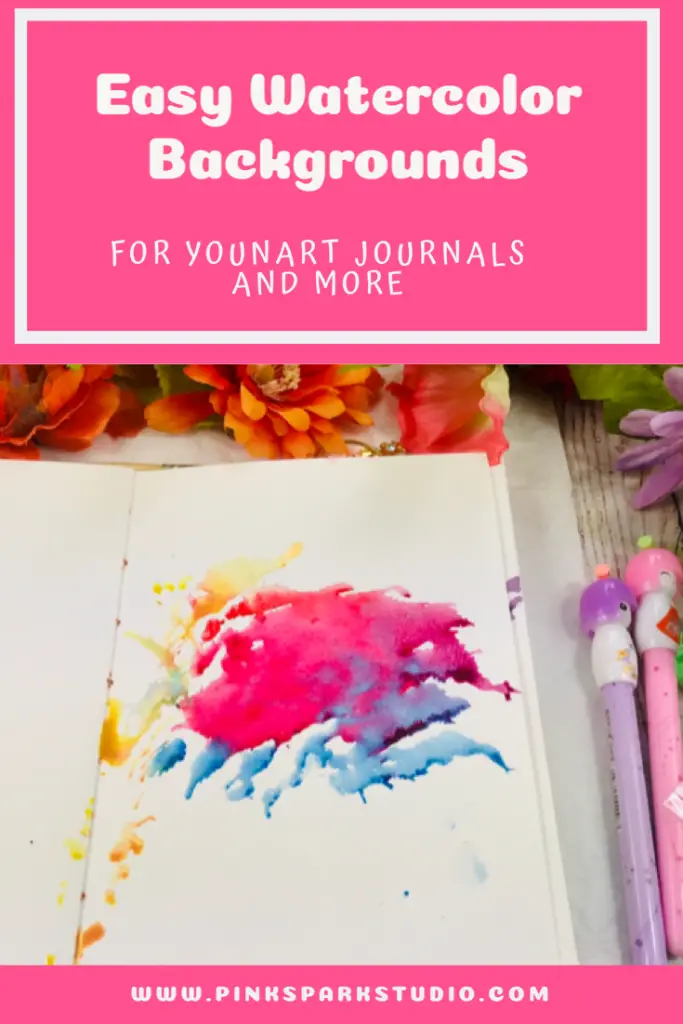
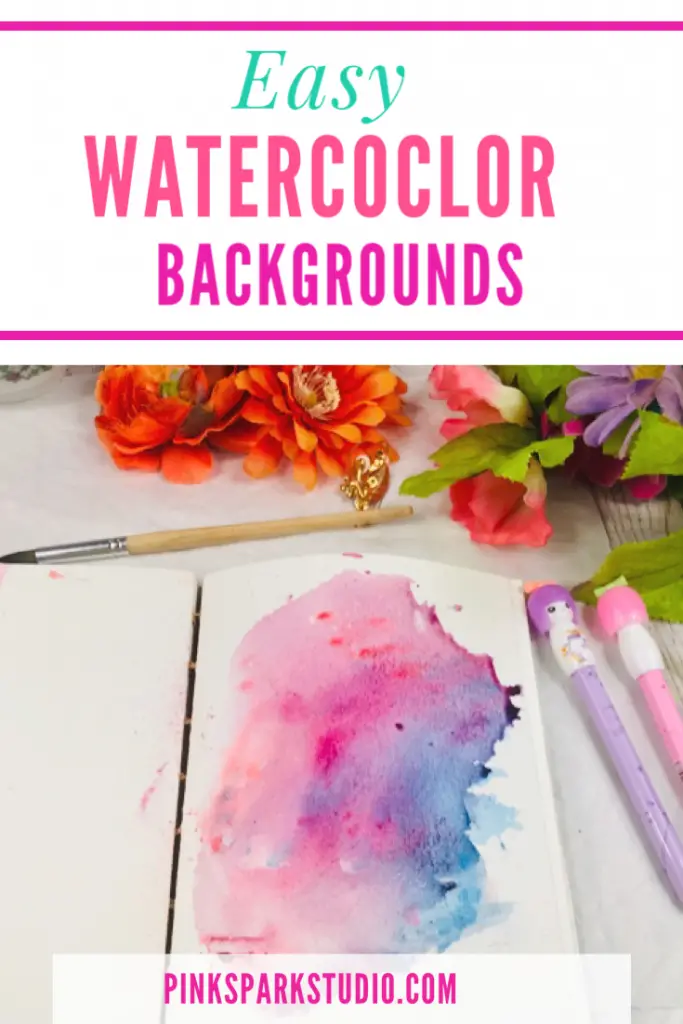
Watercolor Background Ideas
Watercolor backgrounds are so fun to make. I could literally paint these all day. These watercolor painting techniques will be super helpful in both watercolor backgrounds and learning to paint with watercolors in general.

These watercolor background ideas are also perfect for starting your art journal pages. Art journals provide such a wonderful place to get creative and try new things.
Before we get started let’s talk about some supplies and how they can affect your paintings.
Watercolor Painting For Beginners
In this post I’m paint on Canson watercolor paper. This is not artist grade paper. Water tends to sit in top of this paper a bit longer rather than soaking in like it does with Arches watercolor paper.
When painting with watercolor it is sooo helpful to understand how watercolor reacts. If you want to learn more about this you can check out my Watercolor for Beginners tutorial.
If you are painting with Arches, or any watercolor paper that is 100% cotton you’ll notice you’re paint will look and react slightly different. For example, washes can be a lot more smooth and you’ll probably have less streaming. This is really just minor things to keep in mind.
Also, make sure you always have two jars of water. One jar to clean your brush and one jar of clean water. If you are painting with dirty water your colors will show that the water is dirty.
Watercolor painting supplies
The watercolor journal I’m using is one I handmade with Canson watercolor paper as mentioned above. If you’d like to see how I made this journal you can check out the tutorial here.
I am using Mejilo Mission Gold watercolor paints. They are super vibrant and that’s why I love them so much. They have become one of my favorite go to paint sets.
I’m using brushes from Grace Art Brush Set and my Paul Ruebens mop brush.
Watercolor Background Paintings
1.) Splash Watercolor Background
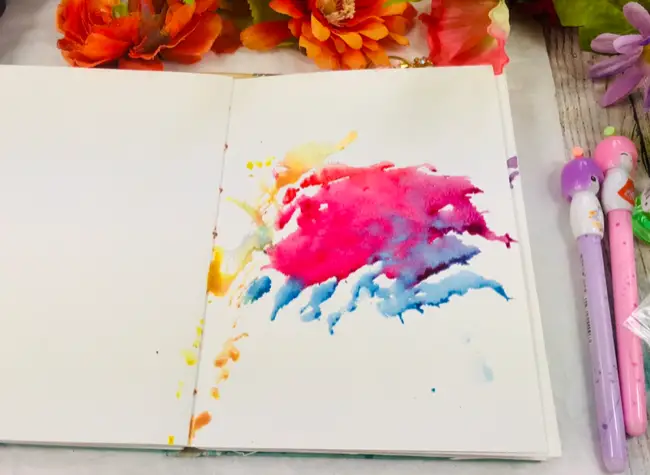
Splash backgrounds are so much fun to make. I often see digital versions of this background, it’s pretty popular. You’ll have a blast creating this watercolor background painting. This watercolor background is perfect for art journaling because you can really create fun and unexpected designs. Try this first thing in the morning to get those creative juices flowing.
To create this watercolor background you’ll need a plastic sandwich bag or something very similar.
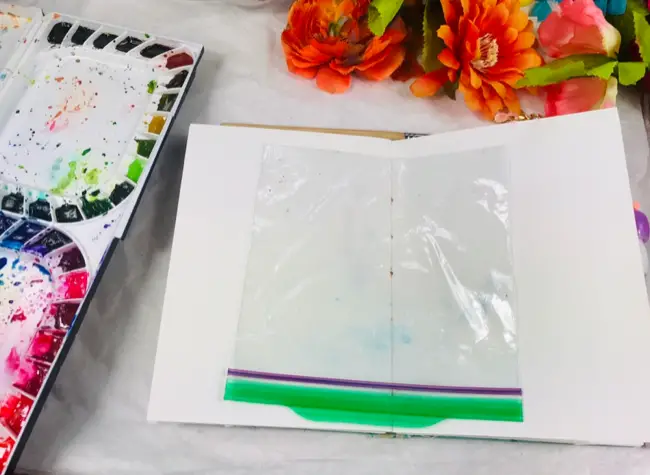
Next, make sure you have envious water mixed into your paint and apply your brush to the bag so large drops form. It’s plastic, so it’s not going to go on as if it’s paper. The drops are what you’re going for.
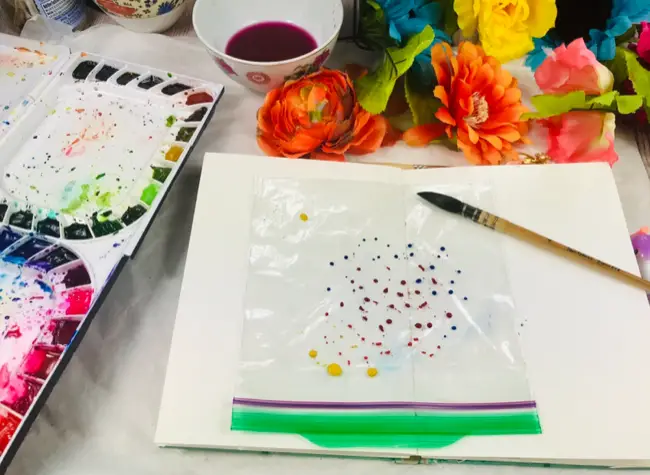
Now, when you have enough paint drops flip the bag into the page.
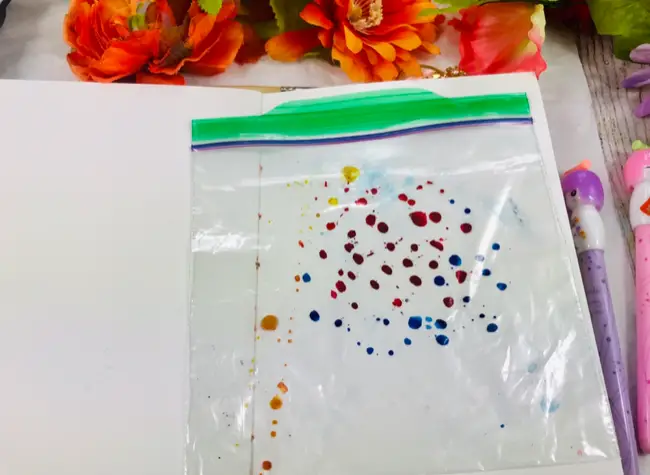
Once flipped, take your finger and smudge the back of the bag so the paint spreads. This is the fun part. You can spread and smoosh the paint however you want.
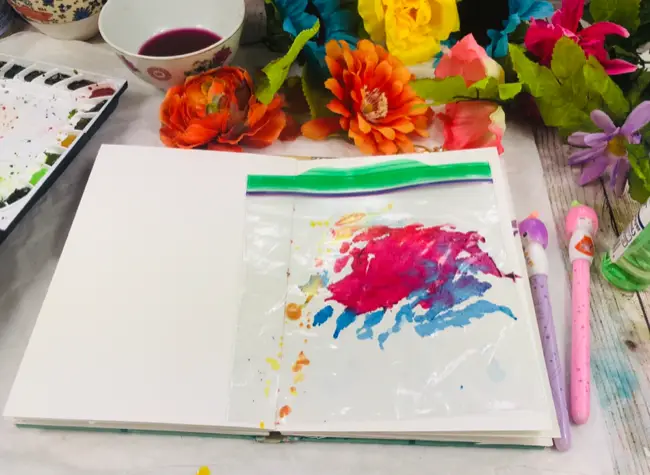
Now, remove the bag and let dry. If you have a lot of paint and water you’ll have to allow extra time for drying.

Another option, you can spray some water, smoosh around the paint ever more. That’s how I got this.
I was just playing around to see what would happen. Always remember to play and experiment when painting with watercolors.
2.) Drip Watercolor Background Painting
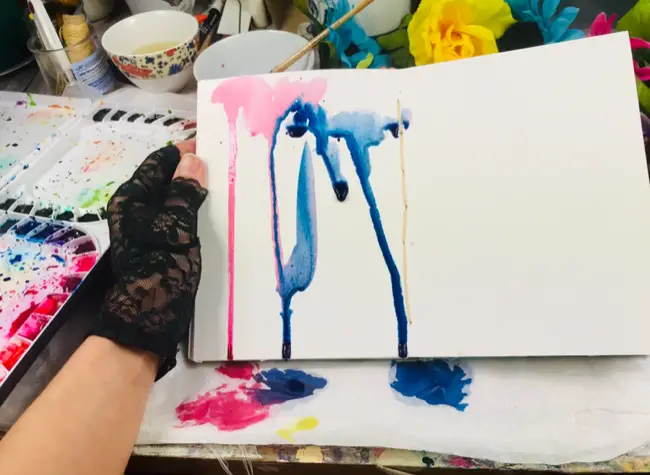
Dripping with watercolor can be done to achieve fun effects. It’s also super fun to start out with a drip background. This watercolor background is unpredictable, it can get messy, and it’s a lot of fun.
I start with a lot of paint and water in my brush and then apply it in a thick line across the page.

Next, angle the page and tap your paper so the water begins to roll down the paper. You can add more water in places you want more drips.
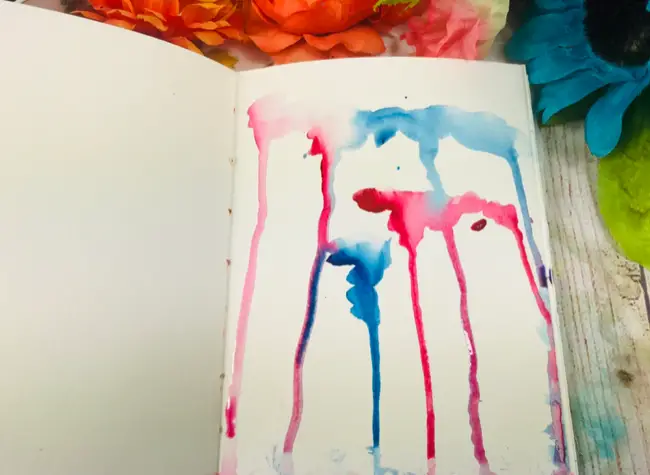
Pro tip: make sure you have a paper towel or something down on your surface so you don’t make a mess or stain your table. I have tons of stains, I don’t always take this advice. I like to get messy. So, if you do to, embrace it. Getting messy is half of the fun of being an artist.
I did blot the bottom of the page a bit. It’s up to you how far you let the drips go down the paper.
3.) Splatter Watercolor Background Painting
This background is serious fun! You can create wild and free backgrounds with splatters. You can also you splatters to accent watercolor paintings.
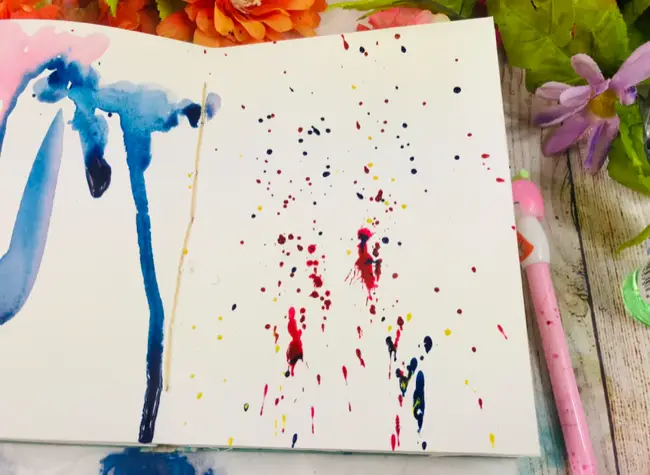
This watercolor background is easy to create and you can make it as unique as you are.
First, remember, the splatter will vary depending on how much paint and water you have in your brush. So, go ahead and play around and practice making splatter. You’ll truly enjoy, bonus, I find this to be a great stress relieving activity.
Step 1, load your brush with some paint and water. Use another brush, pen, pencil, to tap the brush in sending your paint flying across the page in a dance of pigment.
Next, repeat, vary the pressure you use to tap the paint brush to get different size splatters.
Have fun!
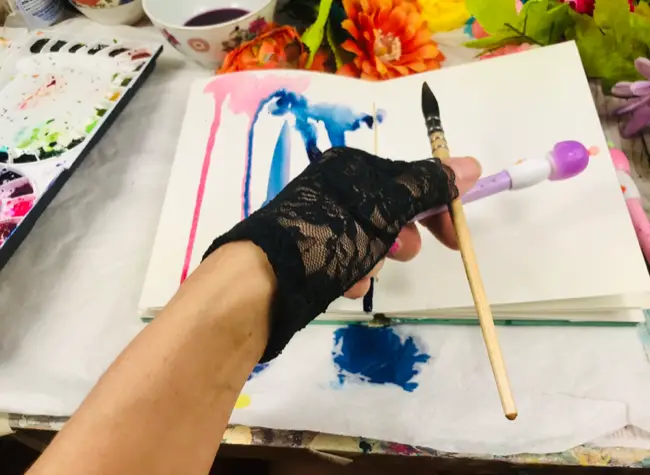
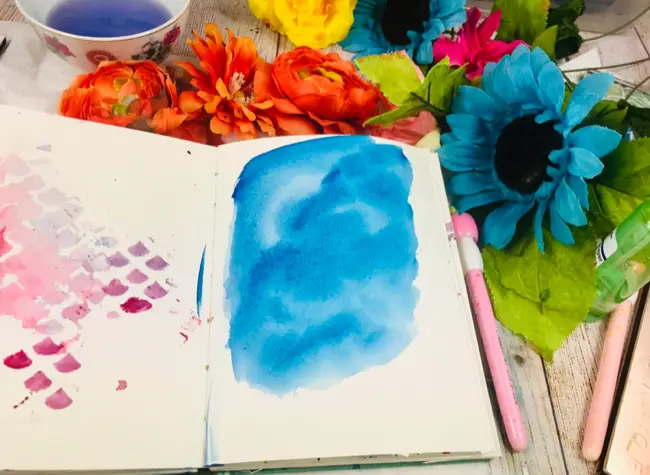
4.) Stencil Watercolor Background Painting
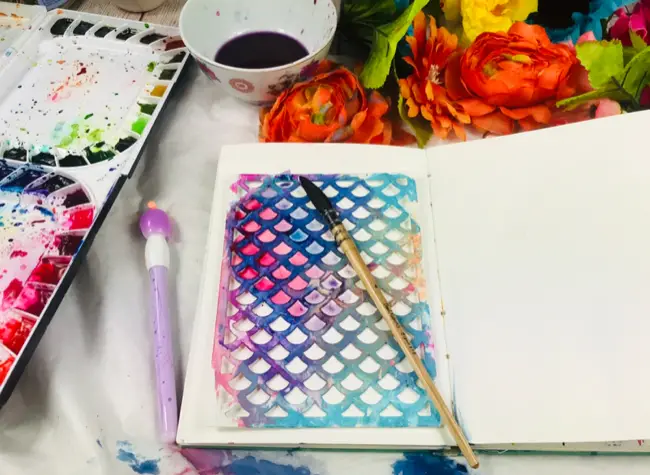
The trick with painting watercolor stencil backgrounds is to be okay with blurred, messy edges. The water tends to get underneath the edges unless you use dry on dry watercolor technique. Even then, it can still get smudgy. But, that’s part of the beauty of watercolor.
In this example below you can see where I used a brush that was really wet and how it got underneath the stencil. Next to it, you can see how I was more careful and used a dry brush.
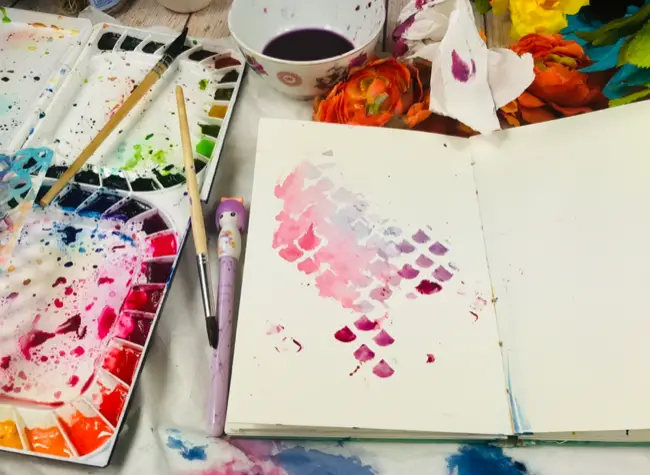
By mixing the two, I now have a very interesting, whimsical, stenciled watercolor background. There are a ton of different stencils on the market. If you don’t own any this post is your justification to go buy some! The stencil I used I got with my acrylic Jane Davenport set. Here is a fun mermaid scale stencil similar to the one I used.
![]()
If you found this post helpful please buy me a coffee help support my blog.
5.) Blot Watercolor Painting Background
Blot away your trouble, are at least some paint. I know I’ve said this before, but I just want to remind you the stress-relieving properties painting has on you.
This could also be called lifting, because you are lifting paint away.
I use this blot method to create clouds and even when I’m painting the ocean. I’ve found that the type of paper towel I use has a bit of effect on my painting. Blotting lifts paint from your paper depending on how much pressure you use and how long you hold the paper towel in the page.
Step 1.) Paint the surface of your page. I did a basic wet background.
Step 2.) Take a bunched up paper towel and blot the paint while it’s still wet. Depending on the type of paper your painting on and how your paper towel is bunched up, you’ll get different patterned in your paper. I got some really sharp edges with this background in my example photos.
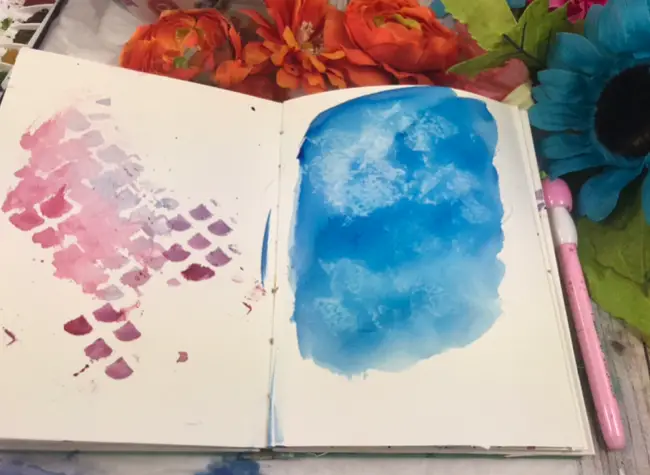
Often, I use this method by lightly and quickly blotting the page. This is how I get cloud like shapes for sky paintings. Give this a try and see what shapes you can create.
Watercolor Washes!
Watercolor washes are fantastic to create. I’m making mine in the Canson paper which as I mentioned above is nothing like 100% cotton paper. I find I get more streaky washes on watercolor paper that is not 100% cotton unless I try really hard. One thing I wish I would have understood when I was new to watercolor painting was the difference in watercolor paper and how it affects your paint.
A watercolor wash is a painted area of your paper, usually thin, transparent, as the paint has been diluted with water.
Washes are usually flat and even. Basically, a watercolor wash is a thin layer paint usually over a large area.
I’m going to teach you four types of watercolor washes washes.
6.) Flat watercolor Wash
A flat wash is as it sounds, a flat area of even watercolor paint. It’s not always the easiest to get a large section of watercolor to go on smooth and uniform. Watercolor dries quickly and if you get too much water you can can end up with pools where the paint dries splotchy. So, don’t worry oof you mess up a few times. As with everything, practice makes ;perfect.
A flat brush is the recommended tool. However, can I tell you a secret? I do all my washes with a round brush. I’ve also noticed many of my favorite Youtube watercolor artists use a round brush. So, use what you’re comfortable painting with.
Before you start painting make sure you mix enough paint for the entire wash. If you have to stop halfway through and mix more paint you may add more or less water and this can create a two toned wash that you may not want.
Now, when painting a flat wash it is really helpful to paint on a tilt so the top of your page is angled up. This helps eliminate pools of water and get a more smooth wash.
Now, Start at the top and move your brush in a side to side motion slowly bringing your brush lower and lower.
When you reload your brush start with the little bead or drop of water that is at the bottom to ensure everything blends.
When I’m doing a flat wash watercolor background for an art journal page I’m really not that careful and I don’t mind having puddles of water or streaks.
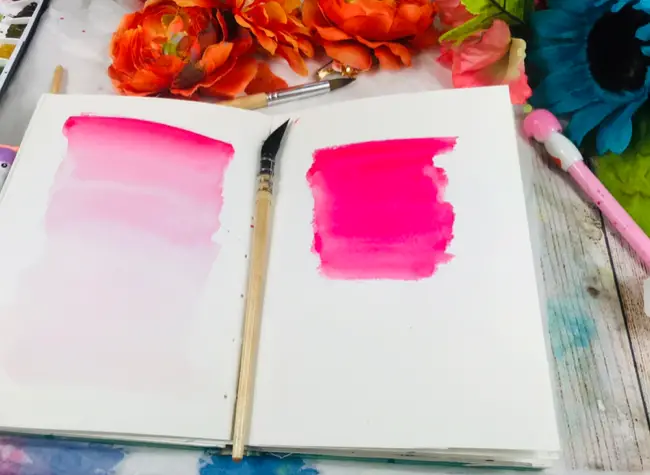
7.) Gradient Watercolor Wash
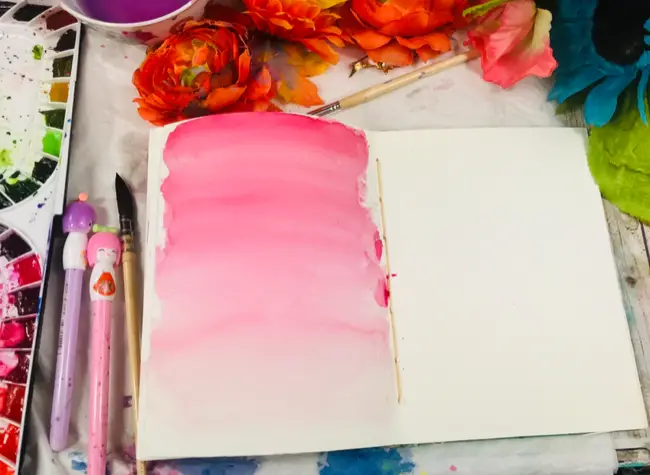
A gradient wash is where the color starts out dark and slowly gets lighter.
To do this start with a nice line of watercolor at the top of your page and begin to paint side to side bringing the paint down the page.
Next, dip your brush in water and start wit the little bead of paint at the edge of the wash and bring down your brush.
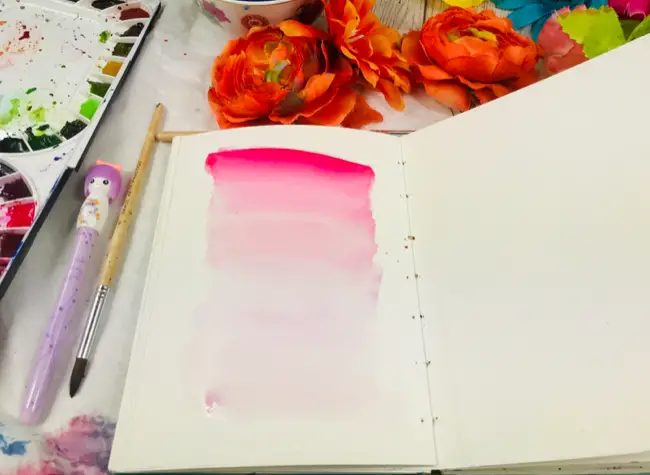
You’re going to keep working the paint slowly down the page until you get to the lightest color at the bottom.
8.) Blended Watercolor Wash
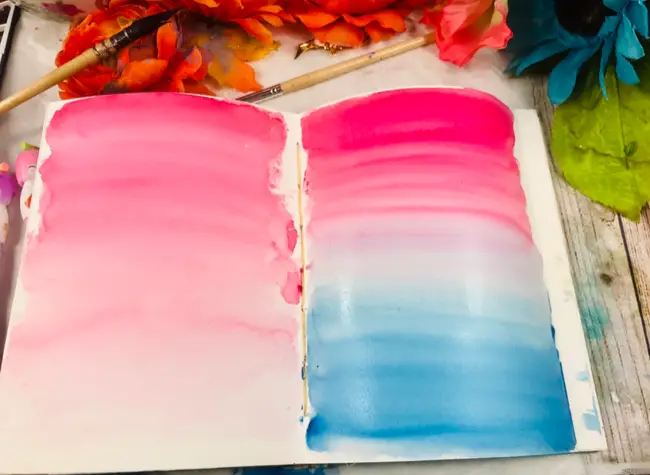
This wash is basically two gradient watercolor washes meeting in the middle and blending.
It’s simple to achieve, though you may need to practice a few times to get the right look. I tend to end up with more paint heavy washes.
Start at one end and work your way to the middle as you did with the gradient wash. Make sure you are getting the wash to lighten evenly.
Now, working quickly start at the other end and create a gradient wash.
Once you meet in the middle lightly work your brush between the two colors together gently blending them.
Now, you have a nice blended watercolor wash.
You can also do a blended wash that doesn’t get lighter, but is a more von color blending into an even color. You simply will use less water. Make sure you are blending colors that mix well. If you mix red and green you’re going to end up with amore muddy color. Mixing pink and blue will give you purple. Not all colors mix in a good way.

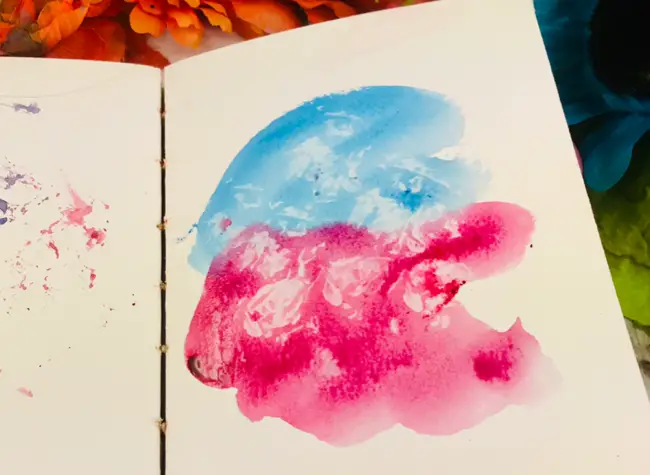
9.) Blended wet background watercolor background
This background is as simple as it is beautiful. It’s also highly versatile so you can use it in a ton of ways.
This watercolor background has a very whimsical look to it and it also works well if you plan to do any lettering on top.
First, with a good amount of paint and water loaded on to you brush, I’m using my mop brush because it holds a ton of water, swoosh your brush around. I use a kind of circular motion.
Next, I add second color that will blend and mix well with my first color. I’m using a pink and blue because when they mix they create a purple and all three colors are super pretty together.
This is a very loose background. Loose watercolor paintings is always good for fun, whimsical painters.
Watercolor Background Ideas
I hope these watercolor Background ideas are helpful to you. Don’t be afraid to practice and make lots of mistakes along the way. Get your art journals out and have a blast!
I’d love to see your work and answer any questions. You can Jon my private Facebook group here.
Remember, these watercolor background ideas are supposed to work for you. Don’t be afraid to try new things, also, don’t be afraid to use your supplies. When I first bought Arches watercolor paper I used on sheet and then let the rest sit for so long. I was so excited to have once paper that I didn’t use it. That’s just silly.
You can use these watercolor backgrounds with watercolor paintings, for art journal pages, to make cards, whatever your creative mind can come up with.
Be sure to check out my other watercolor articles if you liked this one. And, if you like fun free printables sign up for my e-mail and you’ll get the password to my resource library once you confirm.
Have fun painting.
![]()
If you found this tutorial helpful please buy me a coffee and help support my blog.
How to Make Watercolor Backgrounds
Leave a Reply